Your First Livepeer.com Stream in Under 5 minutes

You understand that video transcoding will allow your content to reach more end users. You have been told that anyone looking to broadcast and transcode streaming events, concerts, webinars, and any other kind of user created content can use Livepeer.com in just a couple of minutes, free of cost. You know Livepeer.com has documentation with information that might help you get started transcoding your video. However, you’d still really like someone to walk you through that process in as little time as possible.
You’re in the right place friend. Below is a step-by-step guide with screenshots of how to transcode your first stream through Livepeer.com, in 6 steps, and in under 5 minutes!
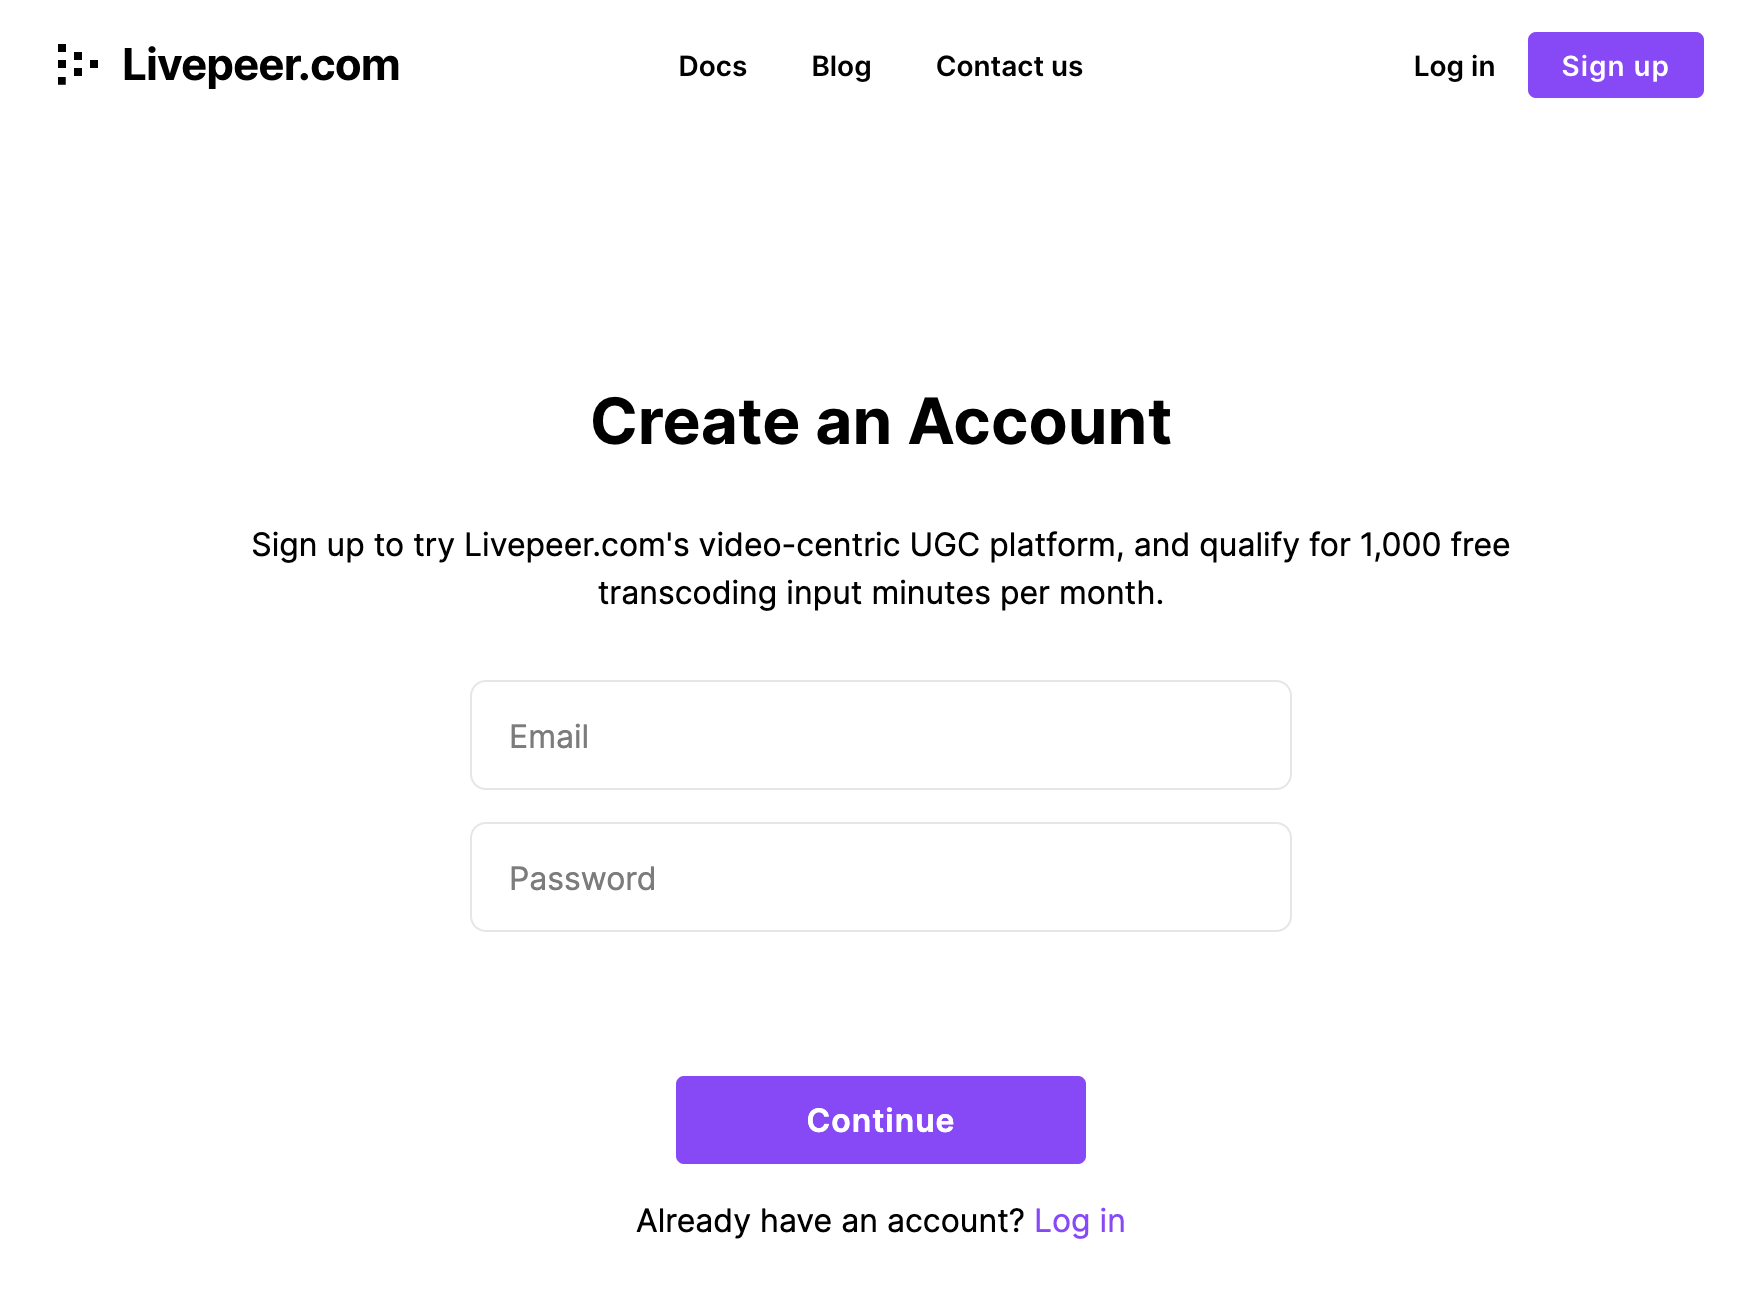
Step 1: Create an account on Livepeer.com
Go to https://livepeer.com/ and click on the "Sign up" button at the top-right hand side of the homepage. It will take you to livepeer.com/register. Type in your email address (preferably your work email address) and a password of your choosing. Click Continue.
Step 2: Verify your Livepeer.com account
After clicking continue in the last step, you’ll see a screen with the following message: “Please check your email for a verification link.” Head over to your inbox and look for an email from support@livepeer.com. The email will look like this:
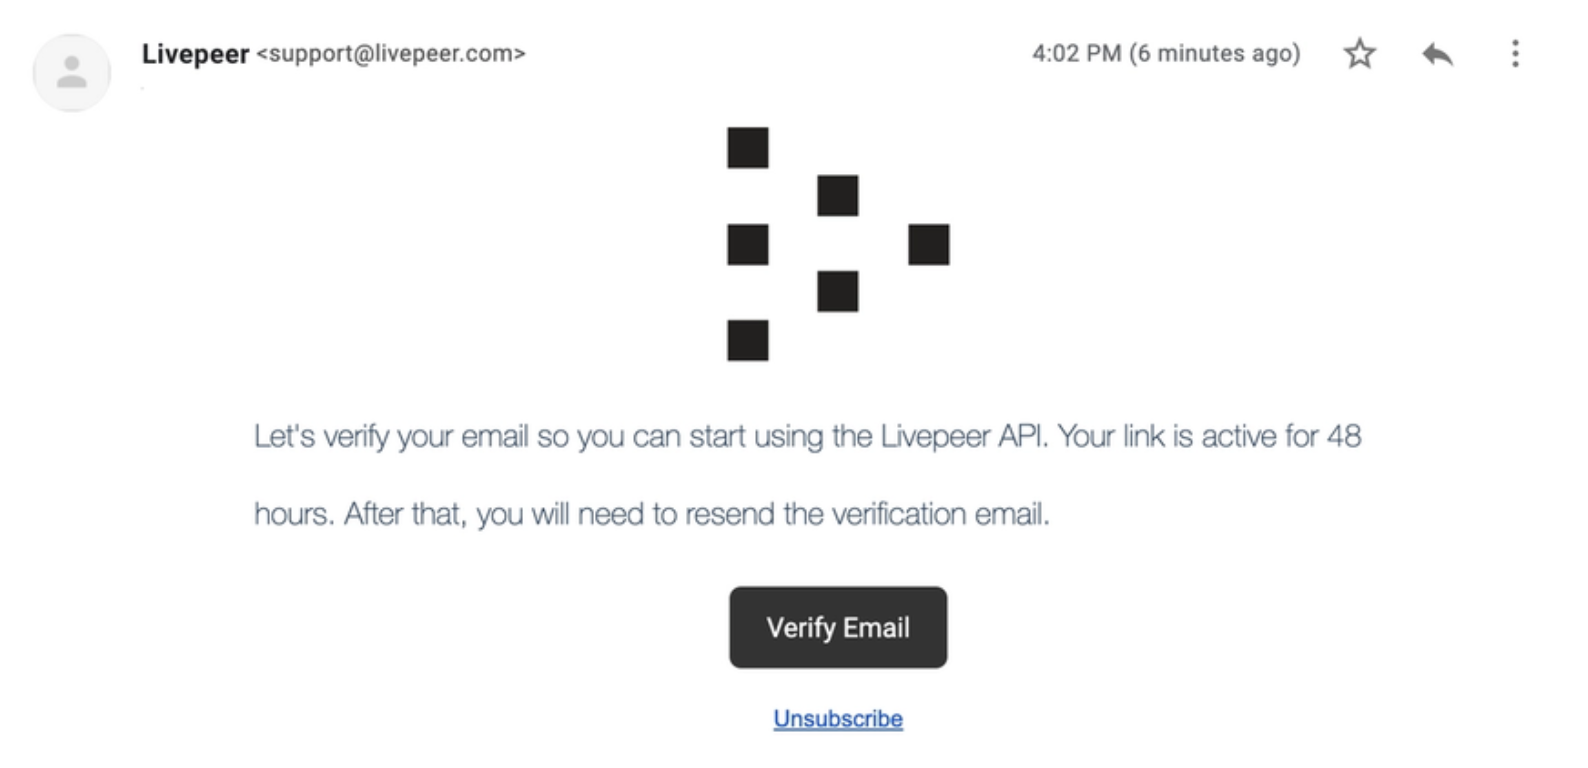
Click on the "Verify Email" button. You will get redirected to your Livepeer.com Dashboard.
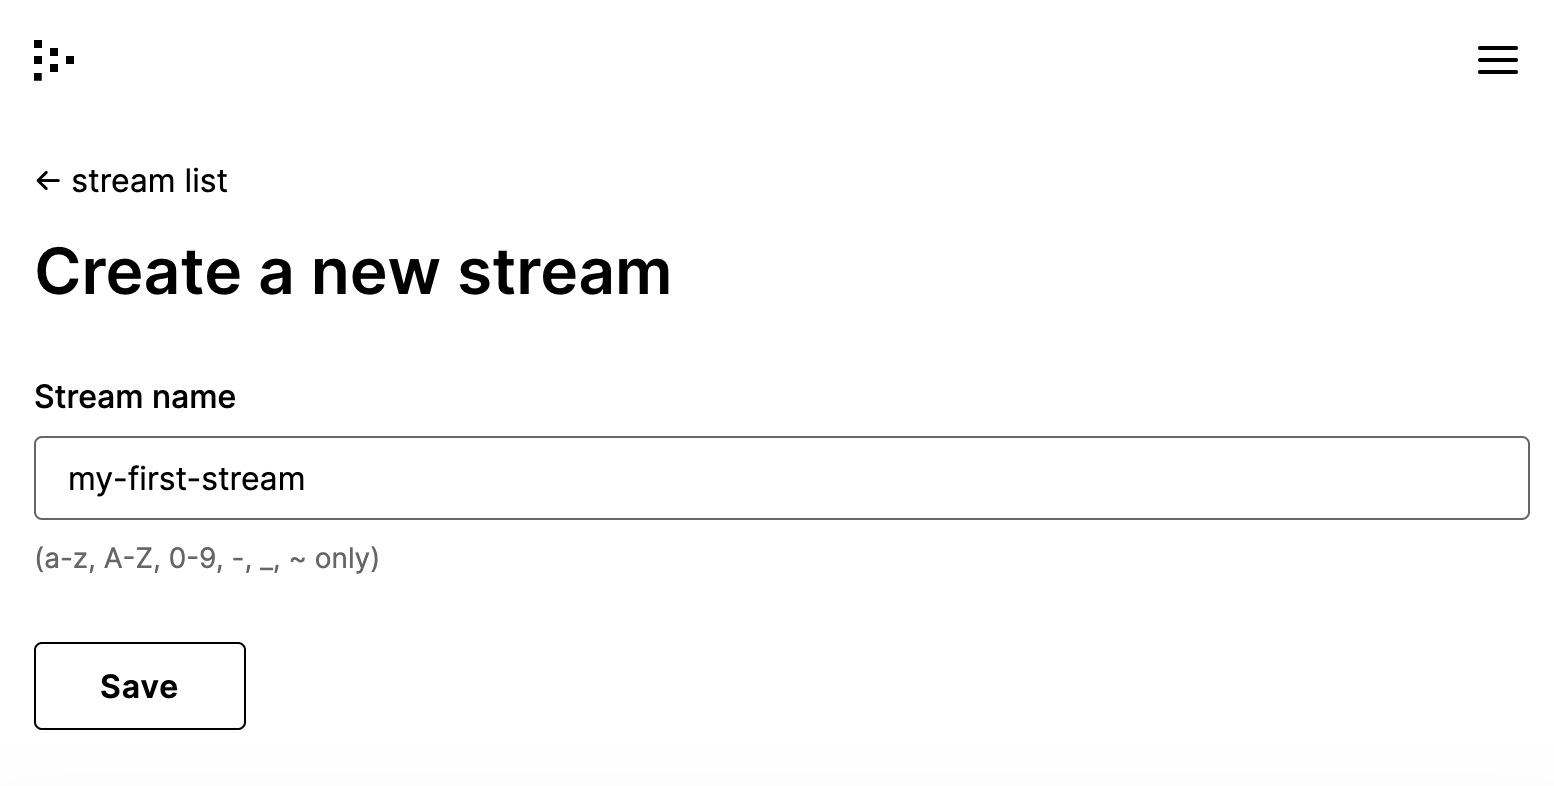
Step 3: Create your first stream
From your Livepeer.com dashboard, click the "Create" button below the “Streams” header. In the next screen titled “Create a new stream”, type in any stream name of your choosing. Click Save.
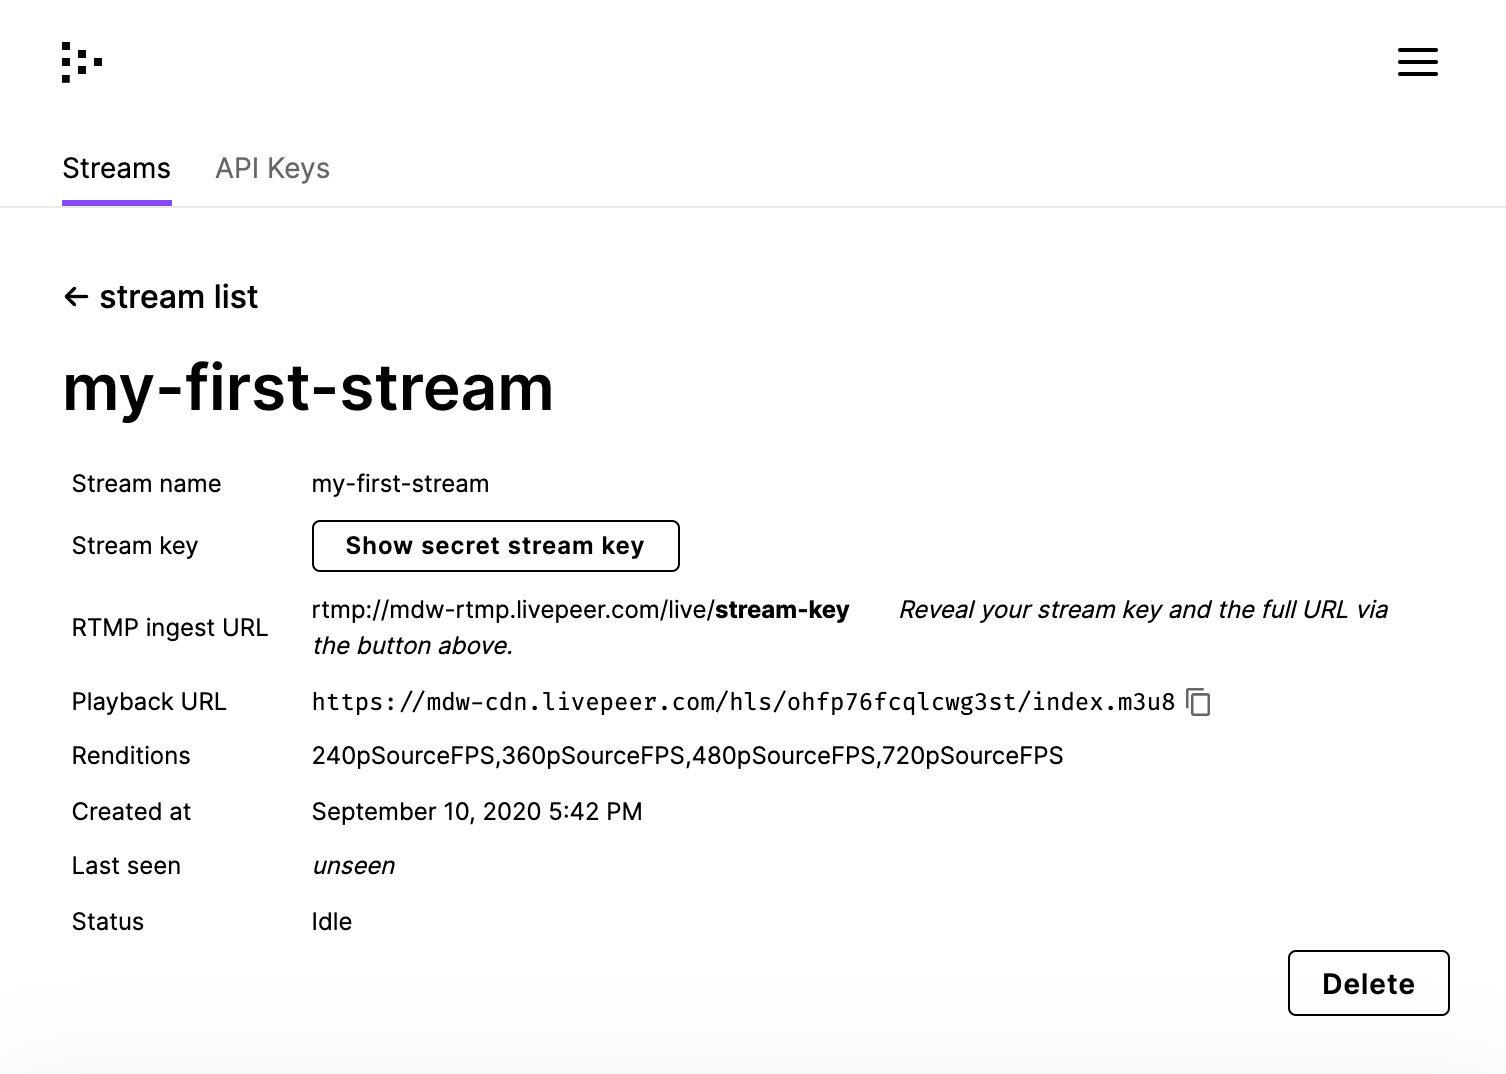
Congratulations! You’ve created a new Livepeer.com stream and should see a screen like the one below.
Don’t click out of this screen just yet … you’ll need to copy and paste a couple of things from here in order to send video into Livepeer.com for transcoding.
Step 4: Install and setup OBS
(If you already have OBS installed on your computer, skip to the next step)
NOTE: Though you can use any broadcasting software or capture device you'd like with Livepeer.com, we'll use OBS for this example.
In a new browser tab, go here to download OBS, a free, open-source video broadcaster software.
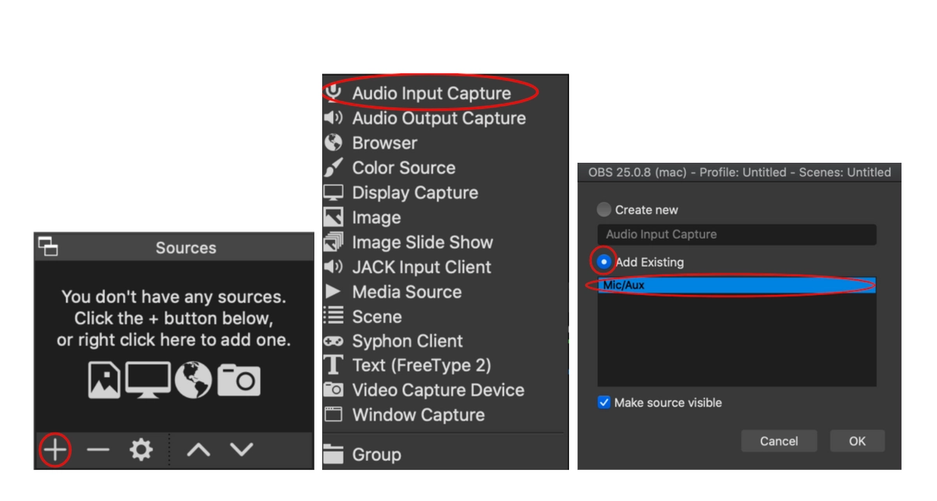
Set up the “Audio Input Capture”, as shown in the screenshot below, by clicking on:
- the “+” button at the bottom left-hand side of the “Sources”
- the “Audio Input Capture” option in the list
- the “Add existing” option, then selecting the microphone that comes up on that list
- the “OK” button
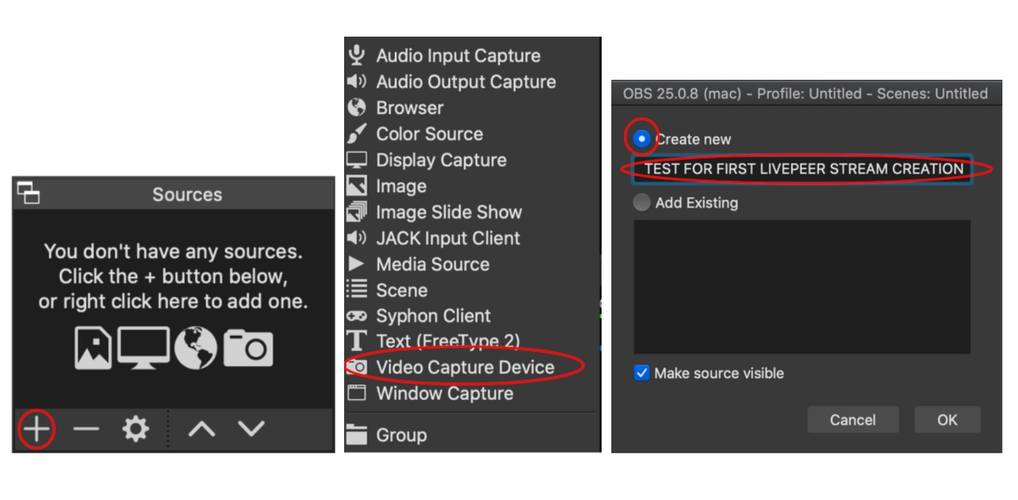
Set up the “Video Capture Device”, as shown in the screenshot below, by clicking on:
- the “+” button at the bottom left-hand side of the “Sources”
- the “Video Capture Device” option in the list
- the "Create new" button, and add whatever name you'd like for your camera in the text field
- the "OK" button
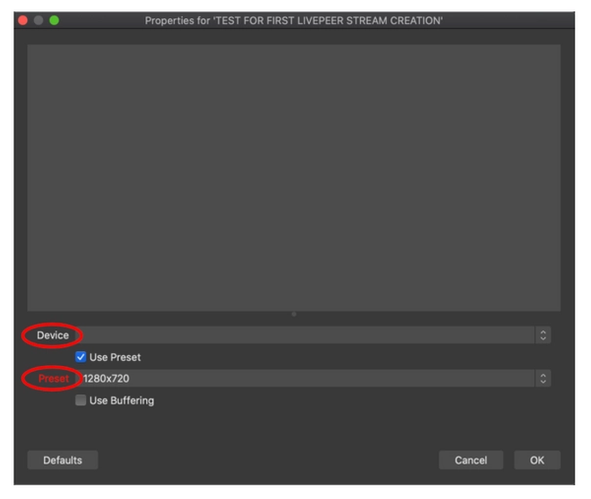
In the screen that pops up, do the following:
- in the “Device” field, select whatever camera is available or is preferred
- in the “Preset” or resolution field, select a resolution you’d like to stream in (1280 x 720 should be okay)
- click "OK"
Step 5: Stream into Livepeer.com using OBS
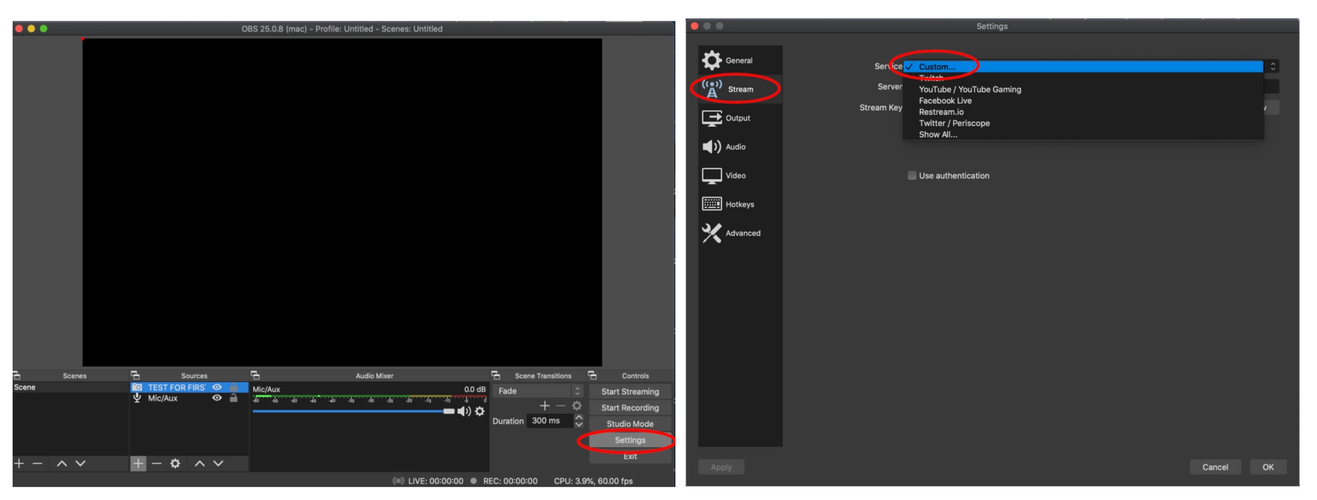
Open OBS and click on:
- “Settings” on the bottom right-hand side of your OBS screen
- “Stream” from the left-hand side menu and select “Custom” from the drop-down menu on the right
From the newly created Livepeer.com stream page click on “Show Secret stream Key”. Copy the “RTMP ingest URL” and paste it into the Server section of of the OBS Stream Settings.
Cut the 16 character hyphenated set of letters at the end of that URL, removing them from that URL, and paste them into the “Stream Key” field
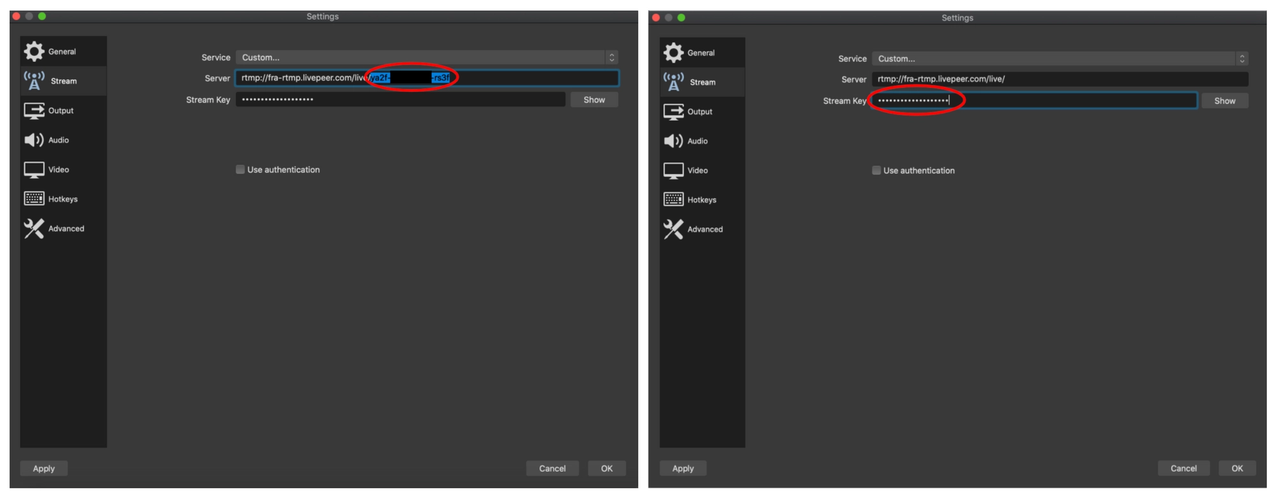
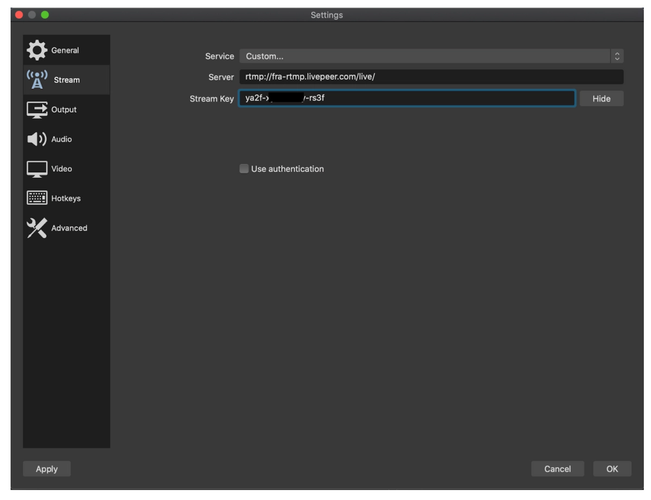
You should see something like this when clicking the “Show” button:
Click Ok on that screen to save your settings and go back on the main OBS screen. Click “Start Streaming" on the bottom right-hand side of the screen. Voila, your stream is now getting transcoded!
Step 6: Watch your transcoded video
NOTE: You can use a number of video players to watch Livepeer.com’s transcoded stream (see Livepeer's Support Matrix for more details). In this example we’ll use Theo Player.
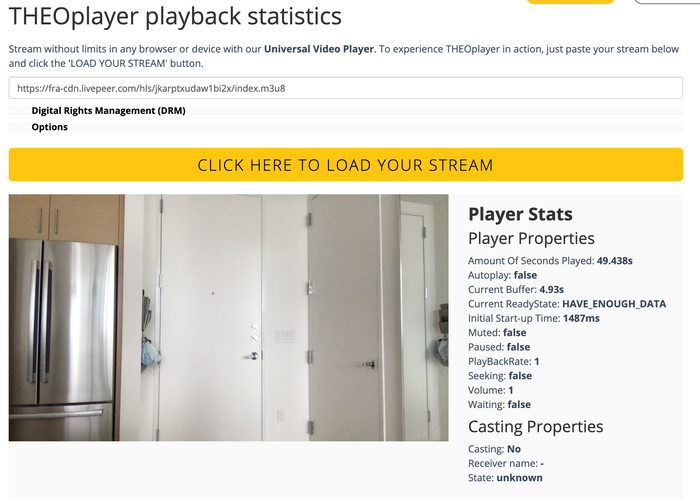
Open TheoPlayer in a new tab on your browser, then:
- copy the “Playback URL” from your Livepeer.com stream page
- paste it into the empty text field in the TheoPlayer page
- click the 'CLICK HERE LOAD YOUR STREAM' button
- click the large yellow arrow in the middle of the video screen to watch your video come to life!
For more information on other broadcast software and players we support, take a look at our feature support matrix.
What did you think of this tutorial? Give us any feedback on how it can be improved and send over any questions you might have by emailing us at hello@livepeer.com. We’d love to help you stream using Livepeer.com!
Articles you may be interested in


Ready to get started?
- Livepeer, Inc.
- 223 Bedford Ave PMB 530
Brooklyn, NY 11211 - hello@livepeer.com