How to Integrate Livepeer.com into a Web App using THEOPlayer

If you’ve been looking to integrate a video player with Livepeer.com, you’ve come to the right place. This is the first of a series of posts that will guide you in integrating Livepeer.com with a video player of your choosing. On this post, we’ll be using THEOPlayer to stream using Livepeer.com.
Step 1: Set up an account on THEOPlayer
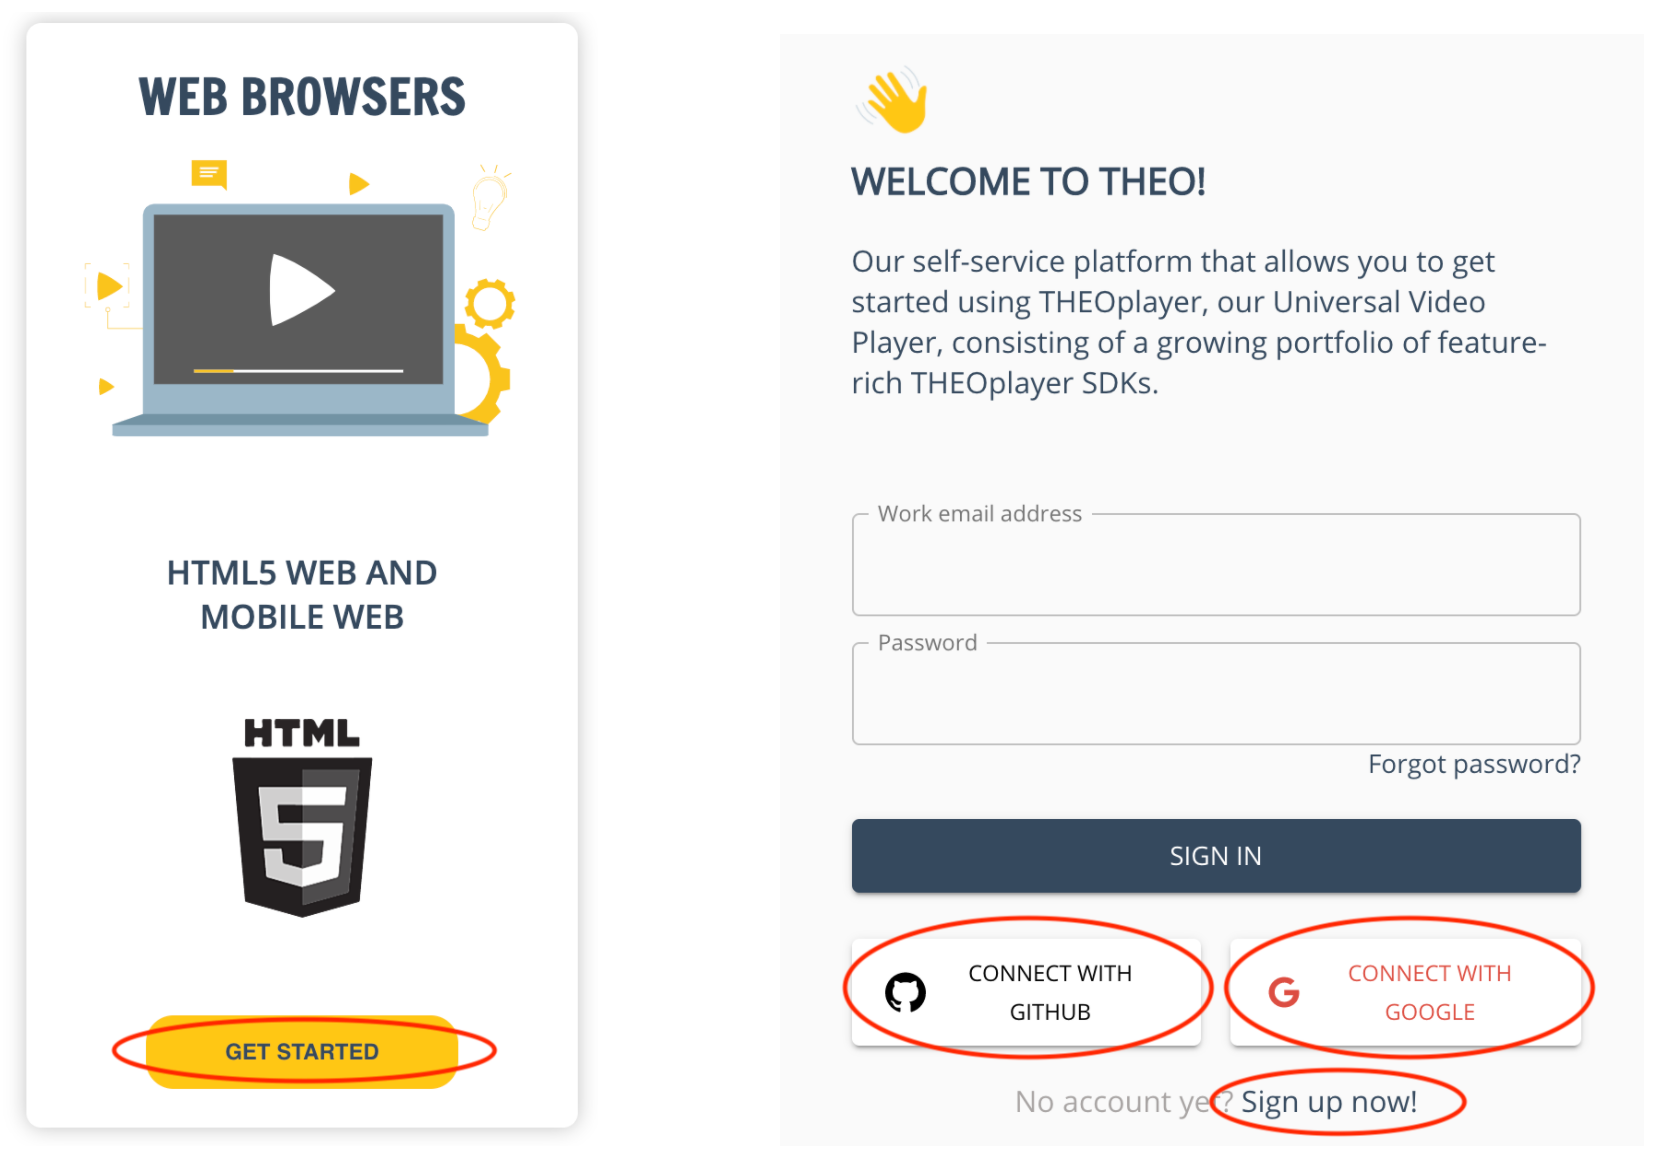
Go to the THEOPlayer licensing page and click on the “Get Started” button in the “Web Browsers” section. You’ll be redirected to a login page. Click on the “Connect with Github”, “Connect with Google”, or click the “Sign up now” button at the bottom and follow the prompts to create an account.
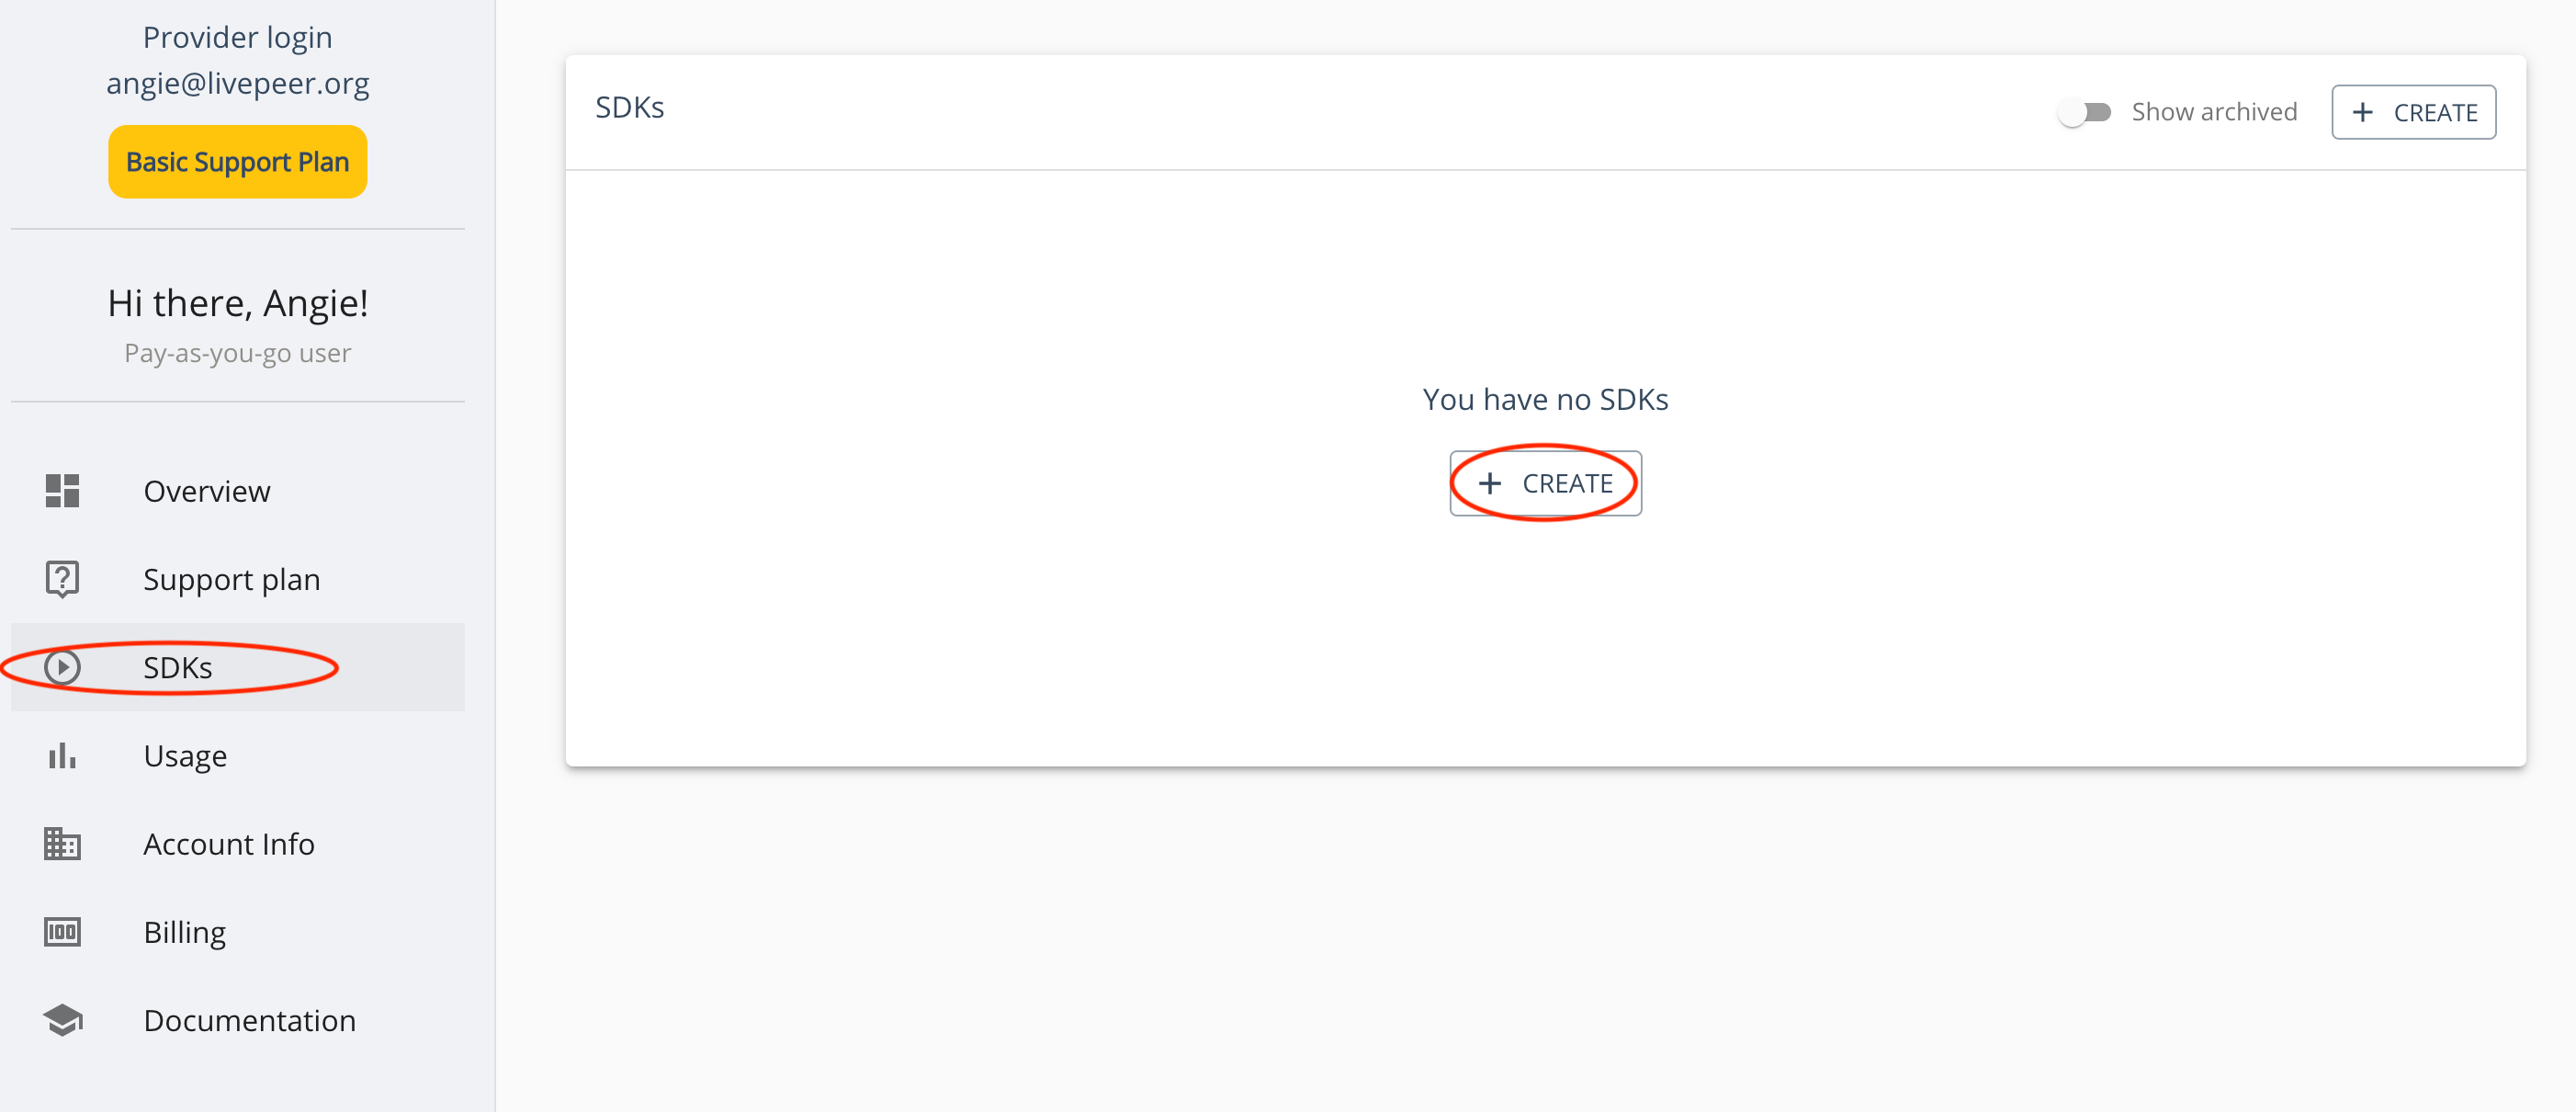
Once you’ve created an account and are logged in:
- select “SDKs” on the left-hand side of the page
- select “Create”
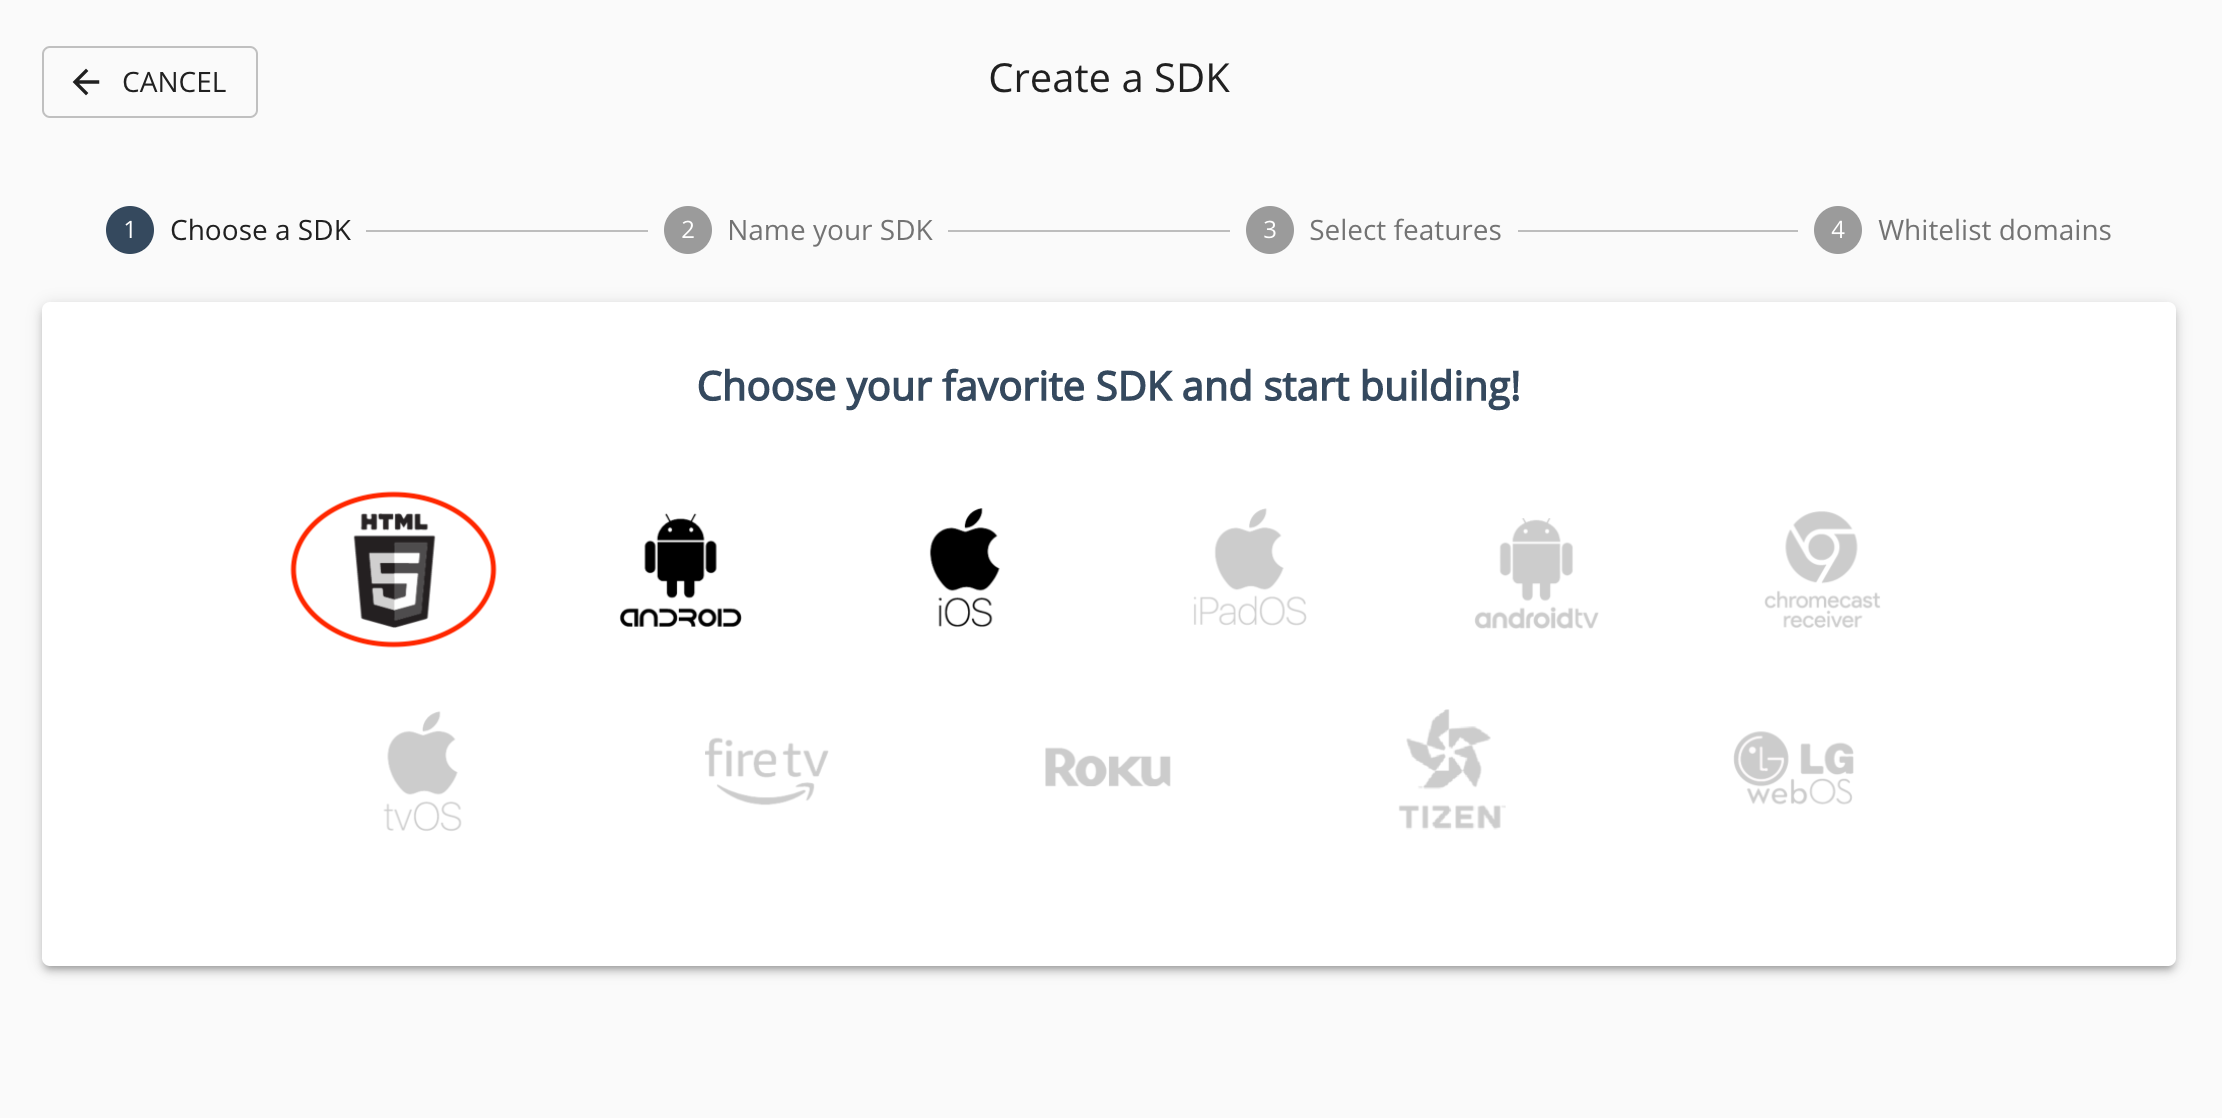
- select HTML 5
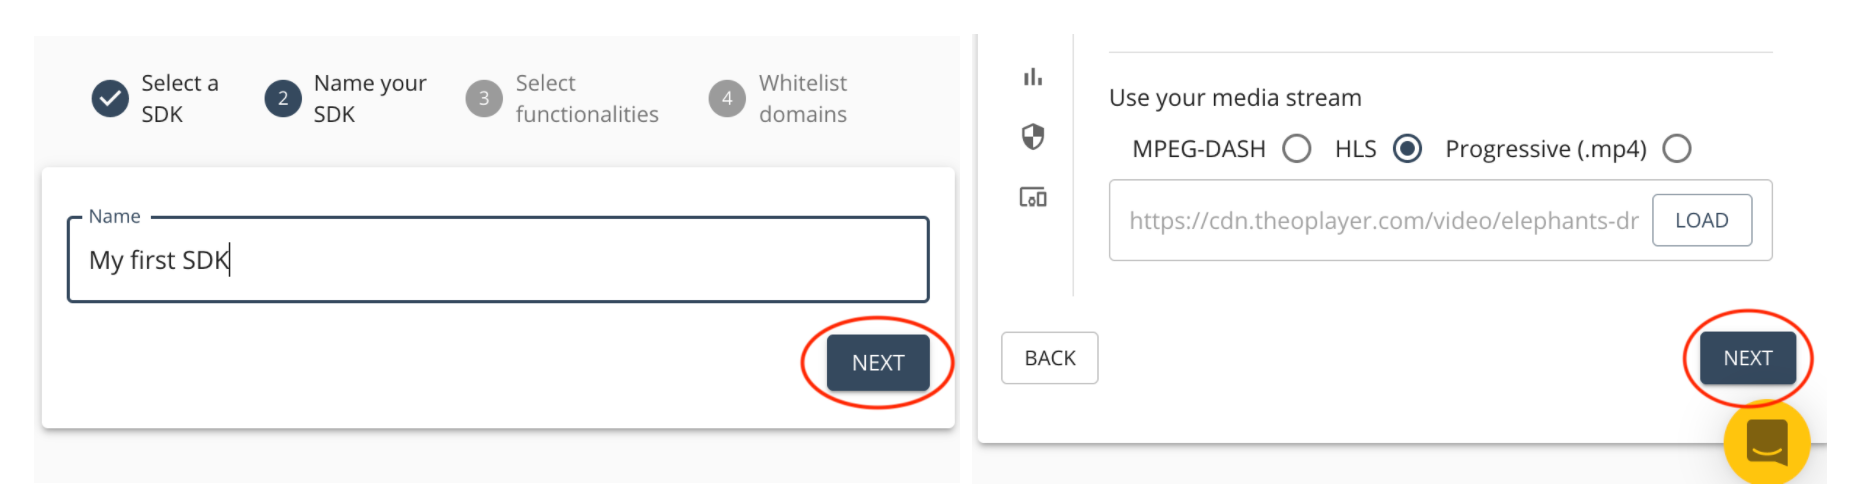
- name your SDK what you’d like, click next
- scroll to the bottom of the screen, click next
- select accept all domains, click publish
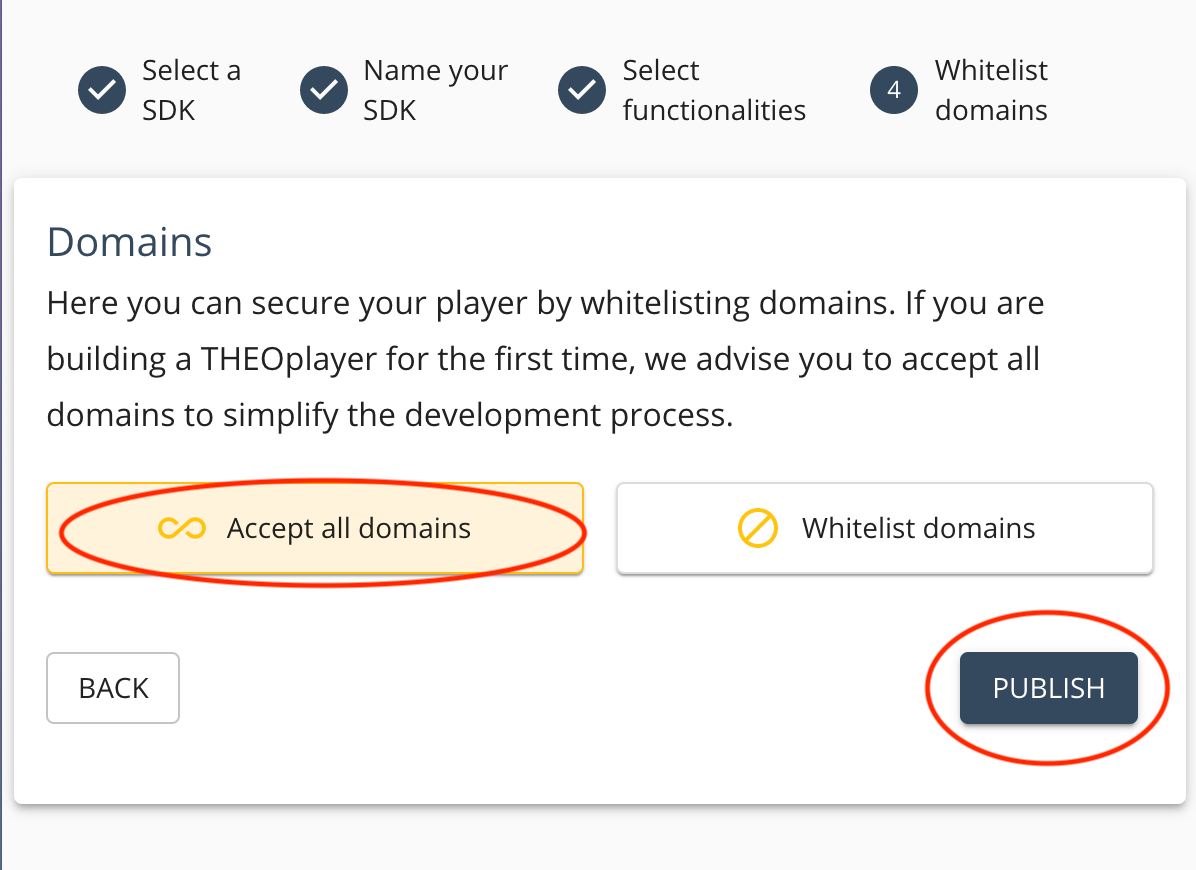
Congratulations! You’ve published your first THEOPlayer SDK.
Step 2: Integrating into your application
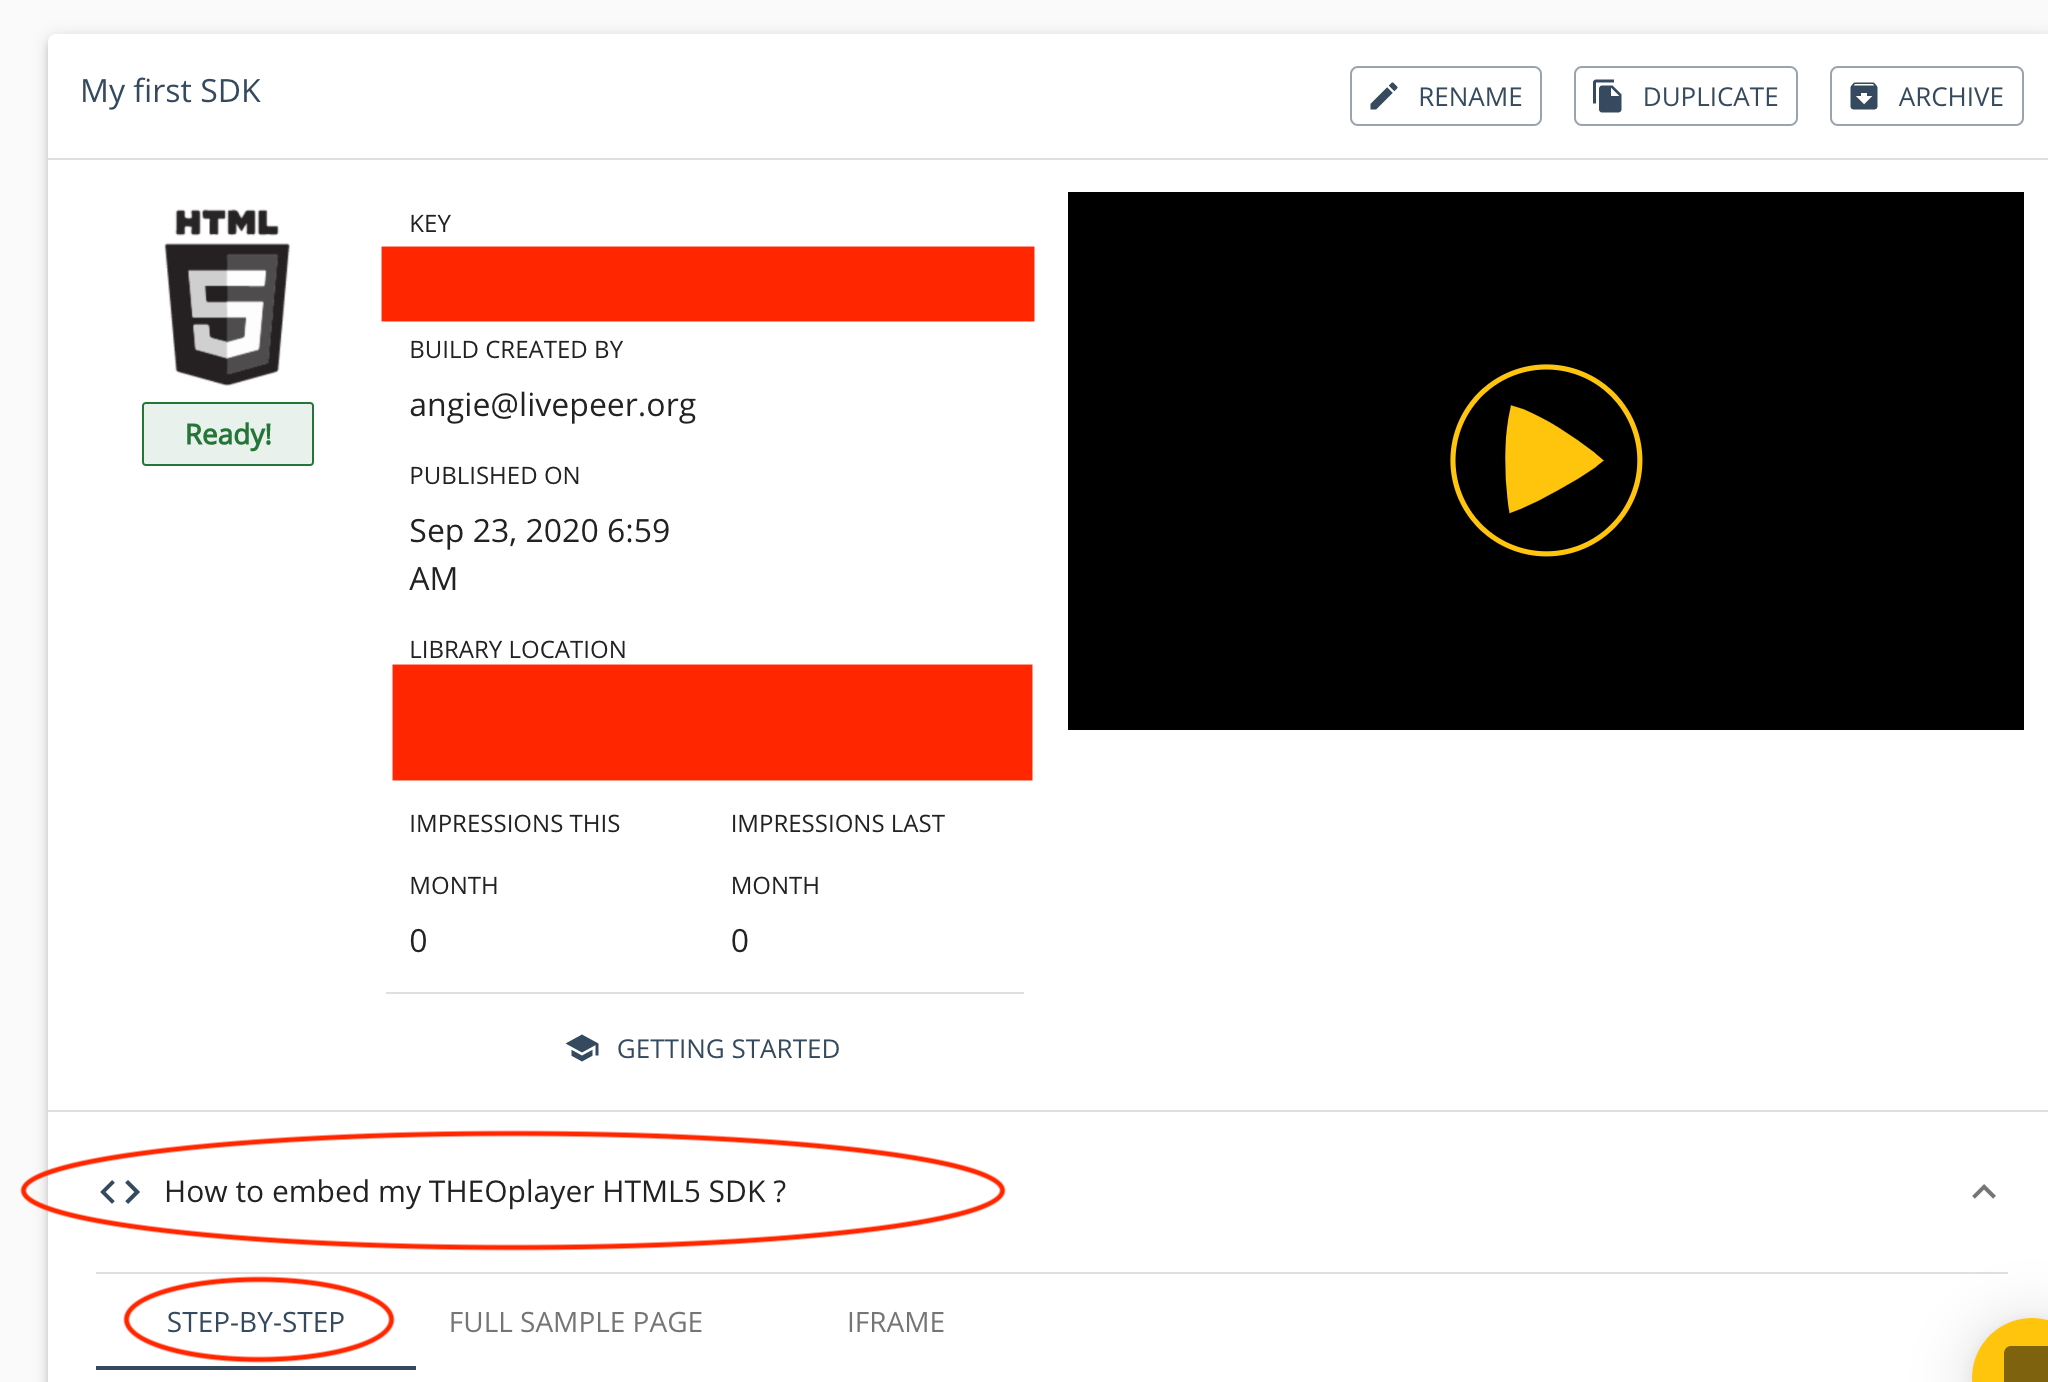
The SDK page you created above should look something like the screenshot below. Red squares have been added to hide two important fields unique to every SDK created - the “Key” and “Library Location” fields, both of which will be used to integrate THEOPlayer into your web app.
Click on “How to embed my THEOPlayer HTML5 SDK” tab at the bottom, then the “Step-By-Step” section to take a look at web app integration code unique to you.
Feel free to follow these “Step-By-Step” THEOPlayer instructions to continue integrating, especially if you’ve customized your player during the setup process, and skip to step 3 in this guide once you do so. Otherwise, for a more detailed THEOPlayer setup, continue reading here.
Let’s start by creating an HTML file that looks like this:
<!DOCTYPE html>
<html lang="en">
    <head>
        <meta charset="UTF-8">
        <title>THEOplayer - Livepeer: Getting Started</title>
        <meta name="viewport" content="width=device-width, initial-scale=1.0">
    </head>
    <body>
        <div class="theoplayer-container video-js theoplayer-skin vjs-16-9"></div>
    </body>
</html>
Add the following code inside the <body> tags in your HTML sheet. Replace {YOURKEY} with your unique THEOPlayer Key from your SDK home page. This will reference the THEOPlayer library and make it available on your homepage.
<!-- THEOplayer library and css -->
<script type="text/javascript" src="https://cdn.myth.theoplayer.com/{YOURKEY}/THEOplayer.js"></script>
To add the THEOplayer UI, you need to reference the THEOplayer CSS file. Add the following Link tags inside the <body> tags of your HTML file, below the script tags we just added. These Link tags are used to add a CSS file to a web page.
<link rel="stylesheet" type="text/css" href="https://cdn.myth.theoplayer.com/{YOURKEY}/ui.css" />Next we’ll create a video element and add it to our page. To start playing a video in your player, you’ll need a video manifest. Paste the following example inside your <body> tags. We're using an HLS sample URL here.
<script>
  var element = document.querySelector(".theoplayer-container");
  var player = new THEOplayer.Player(element, {
    libraryLocation: "https://cdn.myth.theoplayer.com/{YOURKEY} "
  });

  // Customized video player parameters
  player.source = {
    sources: [{
      "src": "https://cdn.theoplayer.com/video/elephants-dream/playlist-single-audio.m3u8",
      "type": "application/x-mpegurl"
    }],
  };

  player.preload = 'auto';
</script>
Once all this has been added, your complete HTML file should look like this:
<!DOCTYPE html>
<html lang="en">
    <head>
        <meta charset="UTF-8">
        <title>THEOplayer - Livepeer: Getting Started</title>
        <meta name="viewport" content="width=device-width, initial-scale=1.0">
    </head>
    <body>
        <!-- THEOplayer UI container -->
        <div class="theoplayer-container video-js theoplayer-skin vjs-16-9"></div>

        <!-- THEOplayer library and css -->
        <script type="text/javascript" src="https://cdn.myth.theoplayer.com/{YOURKEY}/THEOplayer.js"></script>
        <link rel="stylesheet" type="text/css" href="https://cdn.myth.theoplayer.com/<YOURKEY>/ui.css" />

        <!-- THEOplayer configuration -->
        <script>
          var element = document.querySelector(".theoplayer-container");
          var player = new THEOplayer.Player(element, {
            libraryLocation: "https://cdn.myth.theoplayer.com/{YOURKEY} "
          });

          // Customized video player parameters
          player.source = {
              sources: [{
                  "src": "https://cdn.theoplayer.com/video/elephants-dream/playlist-single-audio.m3u8",
                  "type": "application/x-mpegurl"
              }],
          };

          player.preload = 'auto';
        </script>
    </body>
</html>
Step 3: Integrate a Livepeer.com source into your THEOPlayer video player
Login to your livepeer.com account, go to your Livepeer.com Dashboard, and select a stream you’d like to integrate into your application. If you haven’t created a Livepeer stream yet and/or have not yet streamed a video into Livepeer.com, follow this guide to do so. Your stream page should look something like this:
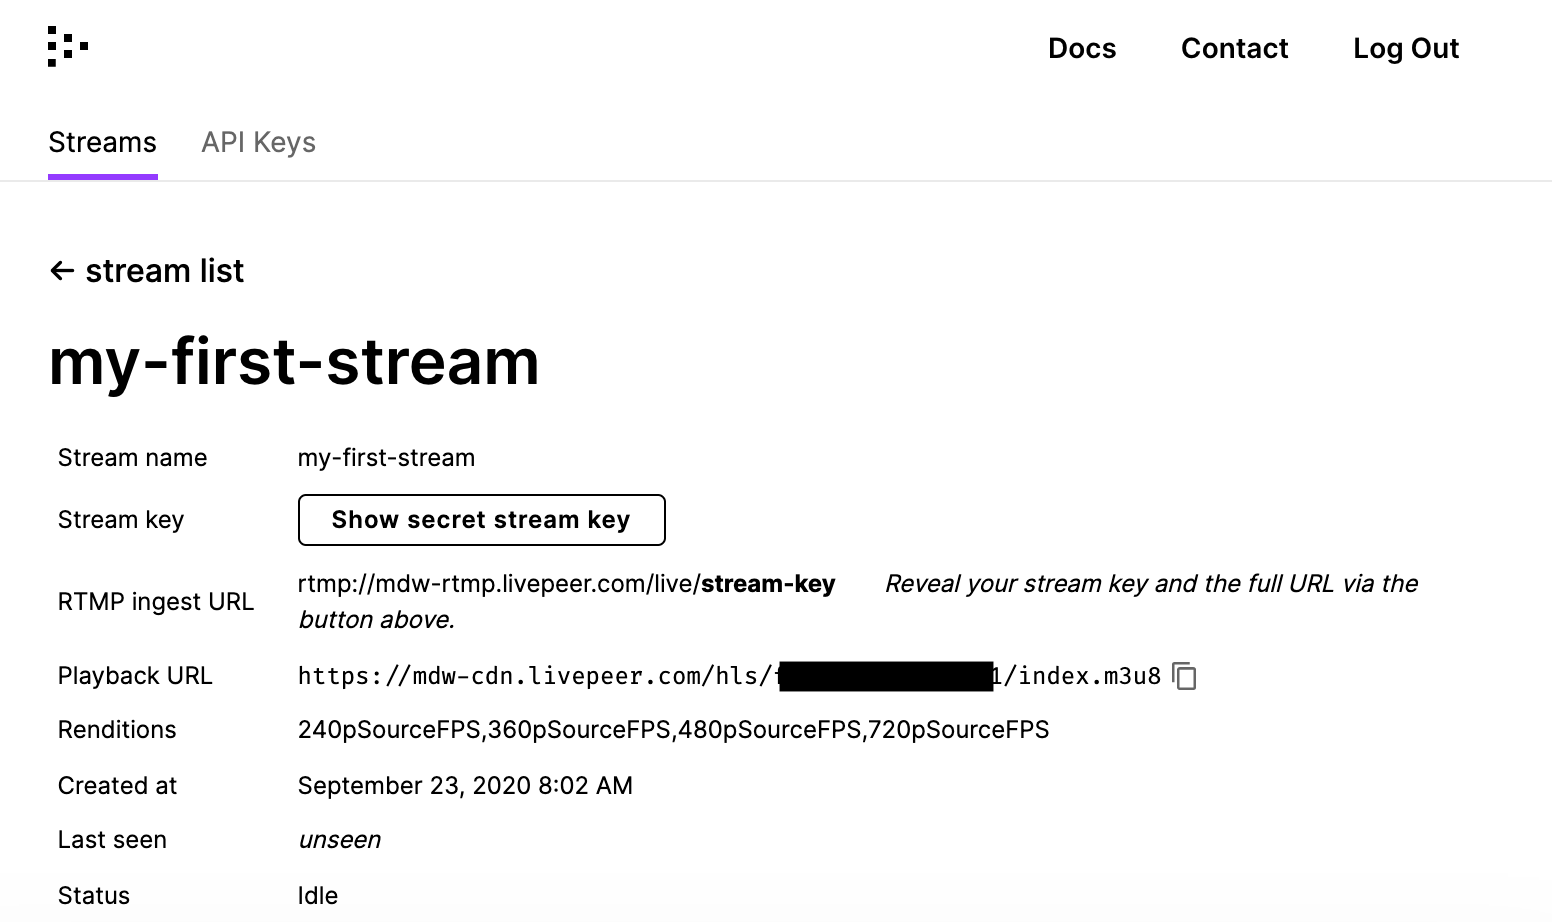
Copy the “RTMP ingest URL” from your stream page. Using OBS, stream a video into Livepeer.com (see step 5 in this guide for detailed instructions on how to do so).
Copy the “Playback URL” from your stream page. Paste into the player.source section of the HTML sheet we made in step 2 in this tutorial. You should be replacing the "https://cdn.theoplayer.com/video/elephants-dream/playlist-single-audio.m3u8" URL from our example with the Livepeer.com Playback URL.
Load up your page, and watch your video come to life!
What did you think of this tutorial? Give us any feedback on how it can be improved and send over any questions you might have by emailing us at hello@livepeer.com. We’d love to help you stream using Livepeer.com!
Articles you may be interested in

Ready to get started?
- Livepeer, Inc.
- 223 Bedford Ave PMB 530
Brooklyn, NY 11211 - hello@livepeer.com